Pages

Search This Blog

Showing posts with label anniversary. Show all posts

Monday, March 16, 2015

How-to: DIY text heart with MSWord & Paint

Like every other social media addicted girl, I turned to Pinterest when I was looking for ideas for a gift as a token of celebration of our first year as a couple. The gift idea morphed into a DIY project as I scrolled through search results for "anniversary gifts for him".

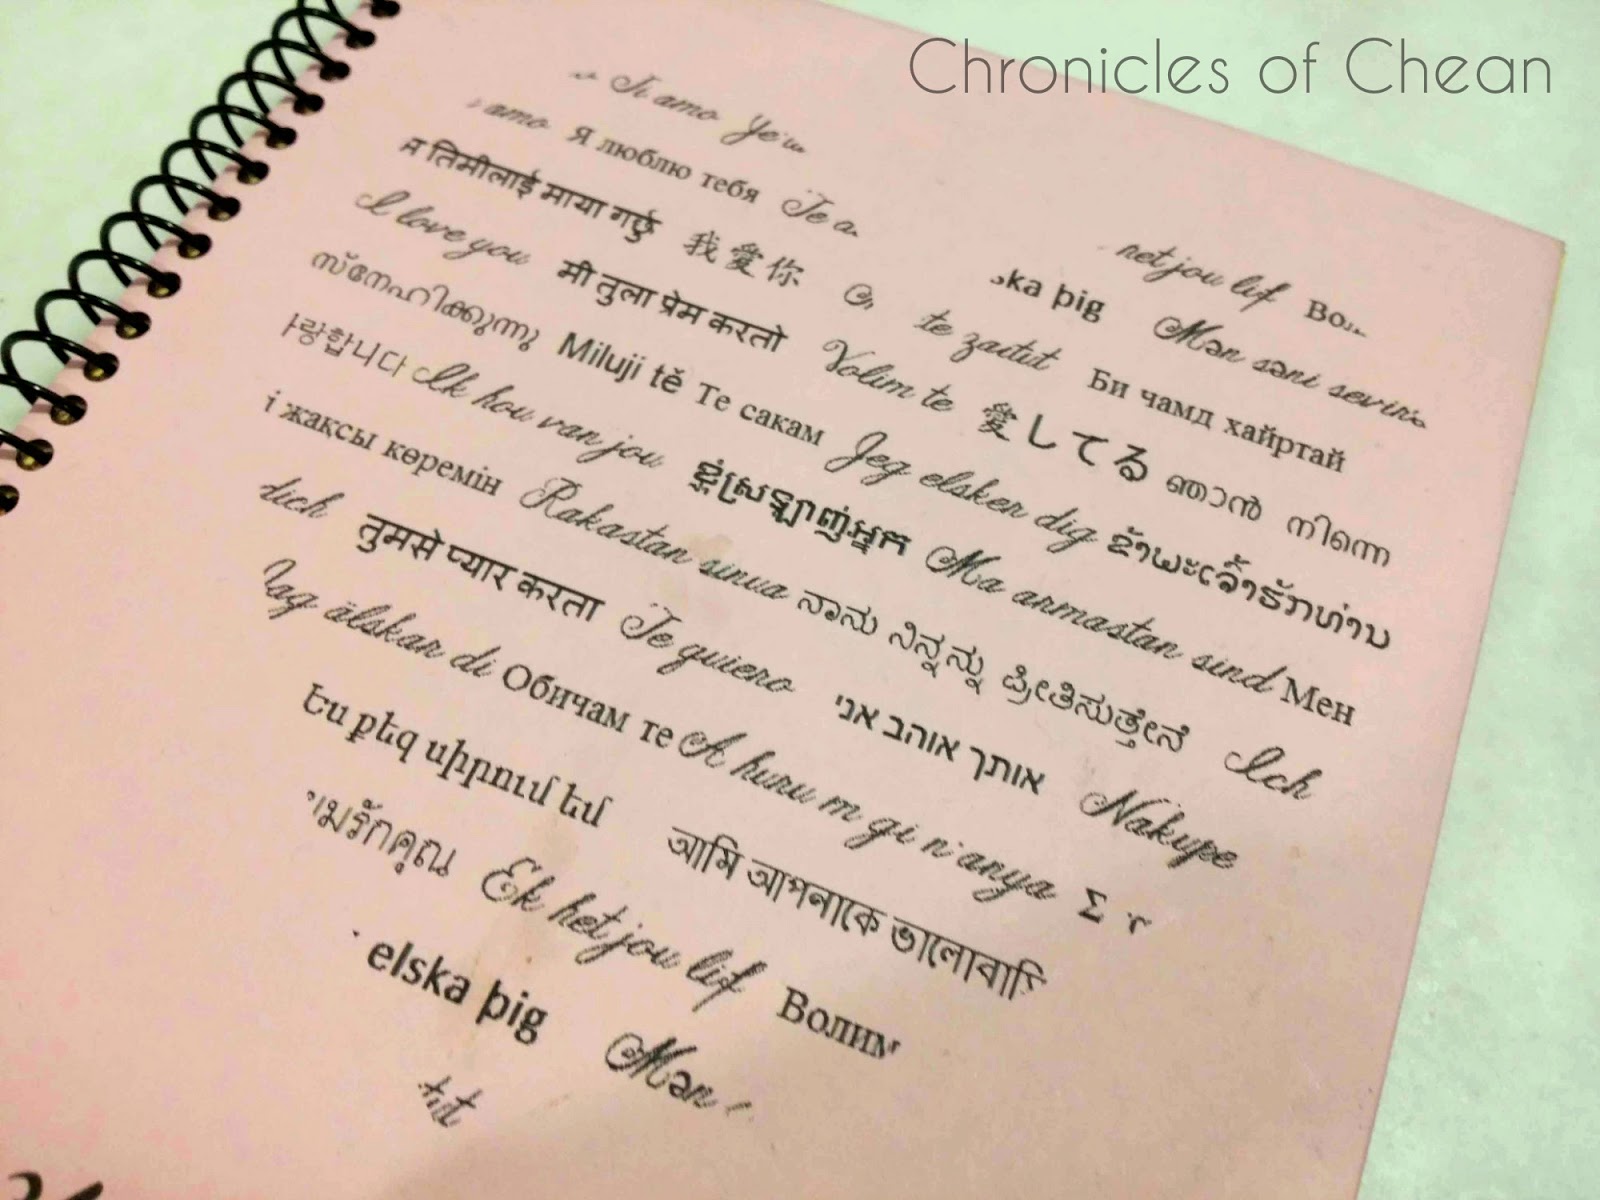
The next idea was a heart made completely out of words, and ideally, all these words should say "I love you", and in different languages for an interesting twist. Kind of life a play on typography (you design peeps understand).


I didn't read much into it, though - I got what information I could from the pin, and didn't search any further and kinda hit-and-missed my way through doing the entire thing.


If you have PhotoShop or Illustrator, I don't think this would be much of a problem. However, for those less equipped (such as my humble self), here's one way to do it using Microsoft Word and Paint.


1. Decide which languages you want to use and get them in their native calligraphy/writing


What I did was just get a bunch of "I love you" translations off Google Translate for a half hour. My SO has a thing for Vitas, so I made a point to include Russian, and the more obvious English, Mandarin, and Korean.


Get all your text and put them into one Word document. You could do it straight in Paint, but doing it in Word first gives you more room for creative typography in terms of color and sizing. Try to have the words you want to stand out within the shape of the heart - a rough estimate would do, but try to center the key words.


2. Ctrl-C + Ctrl-V + Ctrl-S

Get in a full page of text (I had a couple of lines repeated), edited it in color and/or size as you like, then select it all, copy, and paste it into Paint. I changed the font, evened out the text sizes, and justified the spacing, but left it all black.


Adjust the size of the canvas to fit the text. Once you're happy with the overall fitting, save it as a PNG file.

I saved mine as a JPEG file, while turned out a little pixelated when I continued to process and print it. Usually, PNG is used for electronic publishing, and JPEG for printing, but since I still had to use the image it should've been saved as a PNG.


3. Put the words into the heart

Draw the heart while holding down shift for a nice, square-aligned heart. Then adjust the size accordingly.
Once you have the PNG image saved, draw up a new page on Word. Go to Insert, then Shapes, and find the heart shape. Draw it as big as you want, then change the Text wrap to Square so you can move it easily.

Select the heart and Shape Fill with the PNG you just saved.
Remove the outline to complete the word heart.
I was going to print it for A5 paper, so I resized it to about 11-13cm in width. Set the Shape Outline under the Format tab to None, then click on Shape Fill just above Outline, and select Picture... from the drop menu. From the pop up, find and select the PNG you've saved, and voila!

I used this as a cover illustration, but you could use this for a greeting card as well.
If you're unsatisfied with the result, you can always go back to step 2 to make changes, then follow through until you get the result you like. I used this as a cover for the DIY one-year journal that I made for him.


Ps. The width of the heart in the screenshots are different because I went back to recreate the heart for this post.

Thursday, March 12, 2015

Gift idea for couples: DIY relationship journal

I'm a sucker for gifts, and I like my gifts to reflect the amount of thought and effort that I like to express via my gifts.


Of course, a well-chosen store-bought gift, especially when it is something that your partner has been wanting for a long time but has been holding off on purchasing it, is as good as - if not better than - a handcrafted gift.


For our first year together, I wanted to hand-make something sentimental as a token to celebrate our first year. I Googled "anniversary gifts for husband", and I clicked into a Pinterest page filled with all sorts of DIY gift ideas - from couple mugs, to papier mache picture frames, to quaint personalized gifts. For the life of me, I can't find the exact page, though many pins looked very familiar.

I got a bit of dirt on the cover, and got a little cheesy with the wordings LOL
I bought a ton of colored construction paper because I wanted to do something like a book/album-like thing, but I had no solid idea how to go about it. I combined two ideas I got from that Pinterest page: 1. a relationship journal that serves to chronicle our relationship through the past year, and 2. a unique piece that incorporated the mushiness of a relationship with typography design (how to make this would be in another post).


I made mine in A5 size, because I'm a sucker for cute things, and the size was more suitable since I focusing on some of our more memorable days and moments together, punctuated with a few thoughts handwritten in the blank space.


I used:
  • A4 sized colored paper (approx. 70-80gsm would give nice, solid pages)
  • steel ruler, cutting mat & box cutter
  • scissors & A LOT of double-sided tape (or glue, but be aware that it might leave patches on the paper)
  • printed photos
  • custom-made paper labels
  • black gel pen (I used black because my pages were already colorful)
  • resin stickers (or any type of stickers you like)
  • 1x A4 sized thick card (used as cover)

I wanted to focus more on the highlights of our relationship. We both use a couple app called Between, and we organized a lot of our photos according to date, so I thought why not use that?


Here's the step by step process of getting this project done:


1. Planning

I had to decide which occasions to include and which to leave out, and how to organize them. Then I had to lay down a plan on how arrange the elements. I opted for date and title labels as opposed to handwriting them, because my handwriting gets skewed sometimes, and I didn't know how to make them stand out from the rest of the text.

A rough sketch on rough paper was made for the first few pages - there wasn't any extensive, in-detail formatting, but the titles and dates were to be on the top right of each page.


2. Page arrangement

It might help to have some sort of angled ruler or similar that can help you with the folding. I selected a few sheets of a few colors respectively, then folded all of them in half (one sheet of A4 paper is equal to two sheets of A5).


Fold them all tight, then use the box cutter to slice through them, making two sheets of A5 paper. I arranged all of them in non-consecutive colors, so I won't have two of the same color in the range of 3-4 pages at a time.


3. Photo collecting and printing


From the key occasions that I selected, I chose at least one photo each, from Between, Facebook, Instagram, and my own photo albums. Double and triple check for repeats - I scanned through the photos but still managed to print an extra copy of a few photos.

Select all (Shift-A), right click, then select Print... A dialogue box should pop up, prompting you to choose your style of printing, your printing quality, paper quality, etc. Since my book as A5, the photos had to be small enough to fit into the page nicely. Also, I made sure to uncheck the Fit picture to frame box because I didn't want any photos cropped.

I printed 9 photos to a sheet of 70gsm A4 sized white paper, then meticulously cut each and every one photo from 9 sheets of paper with a box cutter and steel ruler.


4. Custom-made date labels

I have a mild case of OCD where my tables in MSWord has to be all uniform and with adequate spacing. I made one table for each type/category of labels - the dates, the occasion, and I did one for the page numbers, but by the time I had the dates and occasion labels cut out, I gave up on them. LOL


I made a point to use 0.5 point dotted lines as the table outlines so it wouldn't be as hideous when I got round to cutting it. 


5. Adhesive backing

About half to three-quarters of a standard roll of double-sided tape was used to stick everything to the pages - the labels as well as the photos.

For the photos, I used a small square in each corner. For all the labels, a small knob at each end, and one more in the center for the longer ones. I contemplated using the gluestick for this, but I tried it on another DIY venture and the adhesion wore off after just a while.


6. Content

After arranging all the photos in chronological order, I set to work labeling each page with a date and the appropriate occasion title, then the relevant photos. Then each page was slowly filled with any thoughts and feelings that were synonymous with that particular day/occasion.

Every now and then I put in a resin sticker that I got at Mr DIY.


7. Cover and binding

I was aiming for the look of a spiral bound journal-type look, with a wrapped hardcover. What I used for the front and back cover was a piece of A4 thick card that was sliced in half much like the book pages.


I DIY-ed the cover illustration, printed it out, then wrapped it around one piece of the A5 thick card, securing with more double-sided tape. Some extra white paper cut to size was used to cover up the back of the cover. I didn't bother with wrapping the back cover.

As for the binding, it was done at a printing shop opposite my old high school, for less than MYR5.


===


So there it is. My projects usually come out looking almost there but lacking something, but I was proud of this particular one. The cover could've looked better, but yeah.


Hope this served as a reference to some of you guys or gals who's into putting a little sweat and blood into a thoughtful gift for you significant other.


Photos taken with Samsung Galaxy Note 3
Edited with Fotor.com

Tuesday, March 10, 2015

Our first year

I'm blogging less and less, partially because I run out of inspiration halfway through a post and give up on it, and also because I have nothing in particular to blog about. However...


On 8th March 2014, he became the first person to ask me to be his girlfriend, while holding my hand. Other relationships started over a screen, regardless of the platform in which it happened, and all followed with a very awkward first meeting - yes, first meeting.


Our celebration of the occasion was partially unplanned - we planned dinner back where he made me his then-very-much-mushy girlfriend, but the later part of the night was planned during the dinner itself. I made him a little spiral bound relationship journal, chronicling our year together (of which my forgetful self did not photograph).

A photo posted by Kellie Low 紫倩 (@thecheanie) on

We both agreed that the baked rice there was our favorites, and we had that with a side of baked mussels. I had just planned on dinner, but an anniversary date wouldn't have been complete without a romantic date to somewhere with a lot of lights.

Digital light displays.
We planned to visit i-City after our Sekinchan trip, but we more or less just stayed home and collapsed sleeping after that trip, and it was the perfect occasion.


I don't think I'm the only girl who's ever fantasized of having a romantic date in the evening surrounded by lights, then imagining a camera panning around you like in an Asian drama. However, it was a weekend and it was packed.


MYR10 per ride per person. They take a photo of you before you get on (if you're attractive), then you can pay another MYR30 for one photo, or MYR50 for a photo and keychain printed with your photo.
Our relationship was filled with a lot of firsts, especially on my side. This was the first time I officially dressed up for an anniversary dinner, went to i-City, and took a ride on such a tall Ferris wheel. I don't really have an issue with heights, but blame Final Destination and for putting paranoia into my psychology.


But it was thrillingly romantic while it was terrifying for me. I guess one part of being a healthy couple is to leverage off the psychological fear of Ferris wheels of your partner and keep jokingly threaten to rock the entire cart a la Morita Shinobu in Honey and Clover.


We walked around, took a lot of photos. I wanted one of the Ferris wheel photos, by the way, but MYR30 just for a photo in a cheesy cardboard frame seemed a little bit too expensive.

Queen of bear statues and peeking belly fat LOL
One part of the entire area was more of a family-friendly park, with double-decker carousel (!!!) and a fish-feeding pond. Walking around that area, and some areas in Genting Highlands is a bit nostalgic. I haven't been completely deprived of such privileges as a child, but I didn't get it as much as other kids in school that bragged about playing with snow and all that. Hell, I only knew shisha existed on a rather embarrassing occasion during foundation.


Call me emotional, or melodramatic, or whichever adjective that floats your boat. The whole night I was close to tears - after everything that we've been through, all the arguments and everything... we were there, having dinner together as a symbolic gesture for our first year together.


I gave him his present after we finished our food, and despite how embarrassed I am at people reading my work in front of me, I wrote as I felt when I was putting the book together. The regrets, the gratitude, the feelings that went into the relationship and hence the book as it recounted our entire year together...


Granted, the year hasn't been altogether smooth. Complications - mostly from my side - arose quite frequently, from loose ends from a previous "relationship", to just downright ignorance and bitchiness.


But regardless of how many arguments and meltdowns we have, he still takes me in his arms, dries my tears, and kisses me saying "I love you". No relationship is a smooth sailing ship - a sailor will not know the sea unless he encounters storms. Without challenges, obstacles, and difficulties, a relationship will never grow.


We became unlikely friends when we met, and he saw me go through one of the darkest and most tumultuous parts of my life. In fact, he was the one I'd call out for drinks outside his place right after work, then I'd rant from dinner time to some hours past midnight.


Sometimes I get scared. Scared that he'll grow tired of my insecurities, my idiosyncrasies, my clumsiness and forgetfulness, the little things that shouldn't matter but bug me constantly. Then he reminds me that he chose me over so many others for a reason - that he loved me, even if I continue tripping over flat ground.


===


All photos taken with Samsung Galaxy Note 3
Edited and watermarked with Fotor.com